Sourdough Starter Care
Welp, here we are folks, 7 weeks and counting….at home. Years ago, I baked and baked and baked- I had a cake pop delivery business for a short time, and a blog and I loved finding challenging recipes to try. Sourdough bread made with starter instead of commercial yeast was always very intriguing but seemed too daunting. I remember reading up on it back then and thinking- “I can barely remember to feed myself twice a day- let alone a jar of funkiness on my kitchen counter!!” ….however, at the moment, I’m here, home, every day, and adding “feed the starter” to the to-do list seemed pretty doable.
An awesome mama friend, Jen, started a fb group for bakers and we all got to chatting about what we were going to be making, what was the “quarantine baking bucket list”, and sourdough was at the top of mine. Sure I’ll probably make about 74 banana bread loaves and 33 batches of cookies here and there too- but the whole concept of a starter was is so fascinating and I couldn’t resist diving in and making one!

There are two ways to do it- make a starter from scratch, or find a neighbor/friend who has one and get some of theirs. I didn’t quite grasp that at first- I was determined to make our own, and on day 3 of “Josh” (our starter that my kids named) a friend reached out to see if I needed a starter, and mentioned that hers has been around since the Gold Rush days (legit, these things can live forever people, so it’s like an actual piece of history that you bake with!!!!), so of course I said YES, and now we have Josh and Emma.
I’ve had nearly 3 full weeks of starter experience- both feeding and baking with the gifted one, and raising up our own, and I want to share my takeaways with you guys as well as my super condensed version of starter care. I’m now the one gifting bits of starter to my friends and neighbors (hi guys!!!) and realized I had messaged the same instructions for everyone over and over so now I can just share this post with all the good stuff in one place! I am also working on a post that will be more focused on the history and how I am using this experience as curriculum and will link that HERE when it’s ready, so come on back for that! There are about eleventythousand resources that will all tell you something different, so as you go, adjust it as you need to to suit your life. I know how many different ways to do this there are because I’ve read most of them. Info overload much?

How to care for a starter someone gives you:
YAY! Someone gave you an active starter! FUN TIMES!! First, scope the container it’s in. Loosen the lid if there is a lid. If there is room for the contents to double or triple you can leave it in that container, if you are worried that it will expand too much, just set it IN a bowl so if it expands past the top of the jar it won’t get all over your counter.
Ask your friend when the starter was last fed, and if possible aim to feed it again around the 12 hour mark. (((if possible, again deep breaths here)))
Established starters are hearty, so try not to stress, I got one from a friend and didn’t feed it till the next day and it was fine, make sure you set it in a bowl or dish and don’t put a tight lid on it, in case it grows overnight.
The idea is to establish a feeding schedule that is consistent- and most sources recommend doing it 2x a day, every 12 hours. That’s what I’ve done with ours. You can also try doing it every 24 hours and see how it goes! If you notice it’s not rising and falling, then try every 12 hours and see if that improves it’s activity.
I recommend being patient with for it 24-48 hours (aka 2-4 feedings) to adjust to your house before baking with it or refrigerating it, or having a panic attack that you killed it- you didn’t.
Ok so what the heck does it mean to “feed” it??
When it’s time to feed your starter, I would HIGHLY recommend a kitchen scale. I started with my postal scale and upgraded to THIS ONE, which is actually for foodstuffs so I don’t freak out when I spill a little!
Get a clean jar.
Stir your starter.
Measure 2 oz of starter into the jar (should be about a shot glass full). Set the original jar with the rest of the starter aside- this remaining “old” starter is called “discard”- but keep reading, you don’t have to throw it away!! (((if you do throw it away, do it in the trash can, NEVER pour starter down the drain unless you really like concrete in your pipes))).
Add 56 grams room temp-lukewarm (again, not hot) water and 56gg flour (unbleached) to the 2oz starter. You can get nuts with the flour- do a combo of rye and whole wheat, do some bread flour, do all purpose- whatever! I recommend keeping it as consistent as possible but these days finding flour can be tricky so opt for unbleached when possible and it should be fine!
56g flour is about 1/2 cup and 56 g water is about 1/4 a cup.
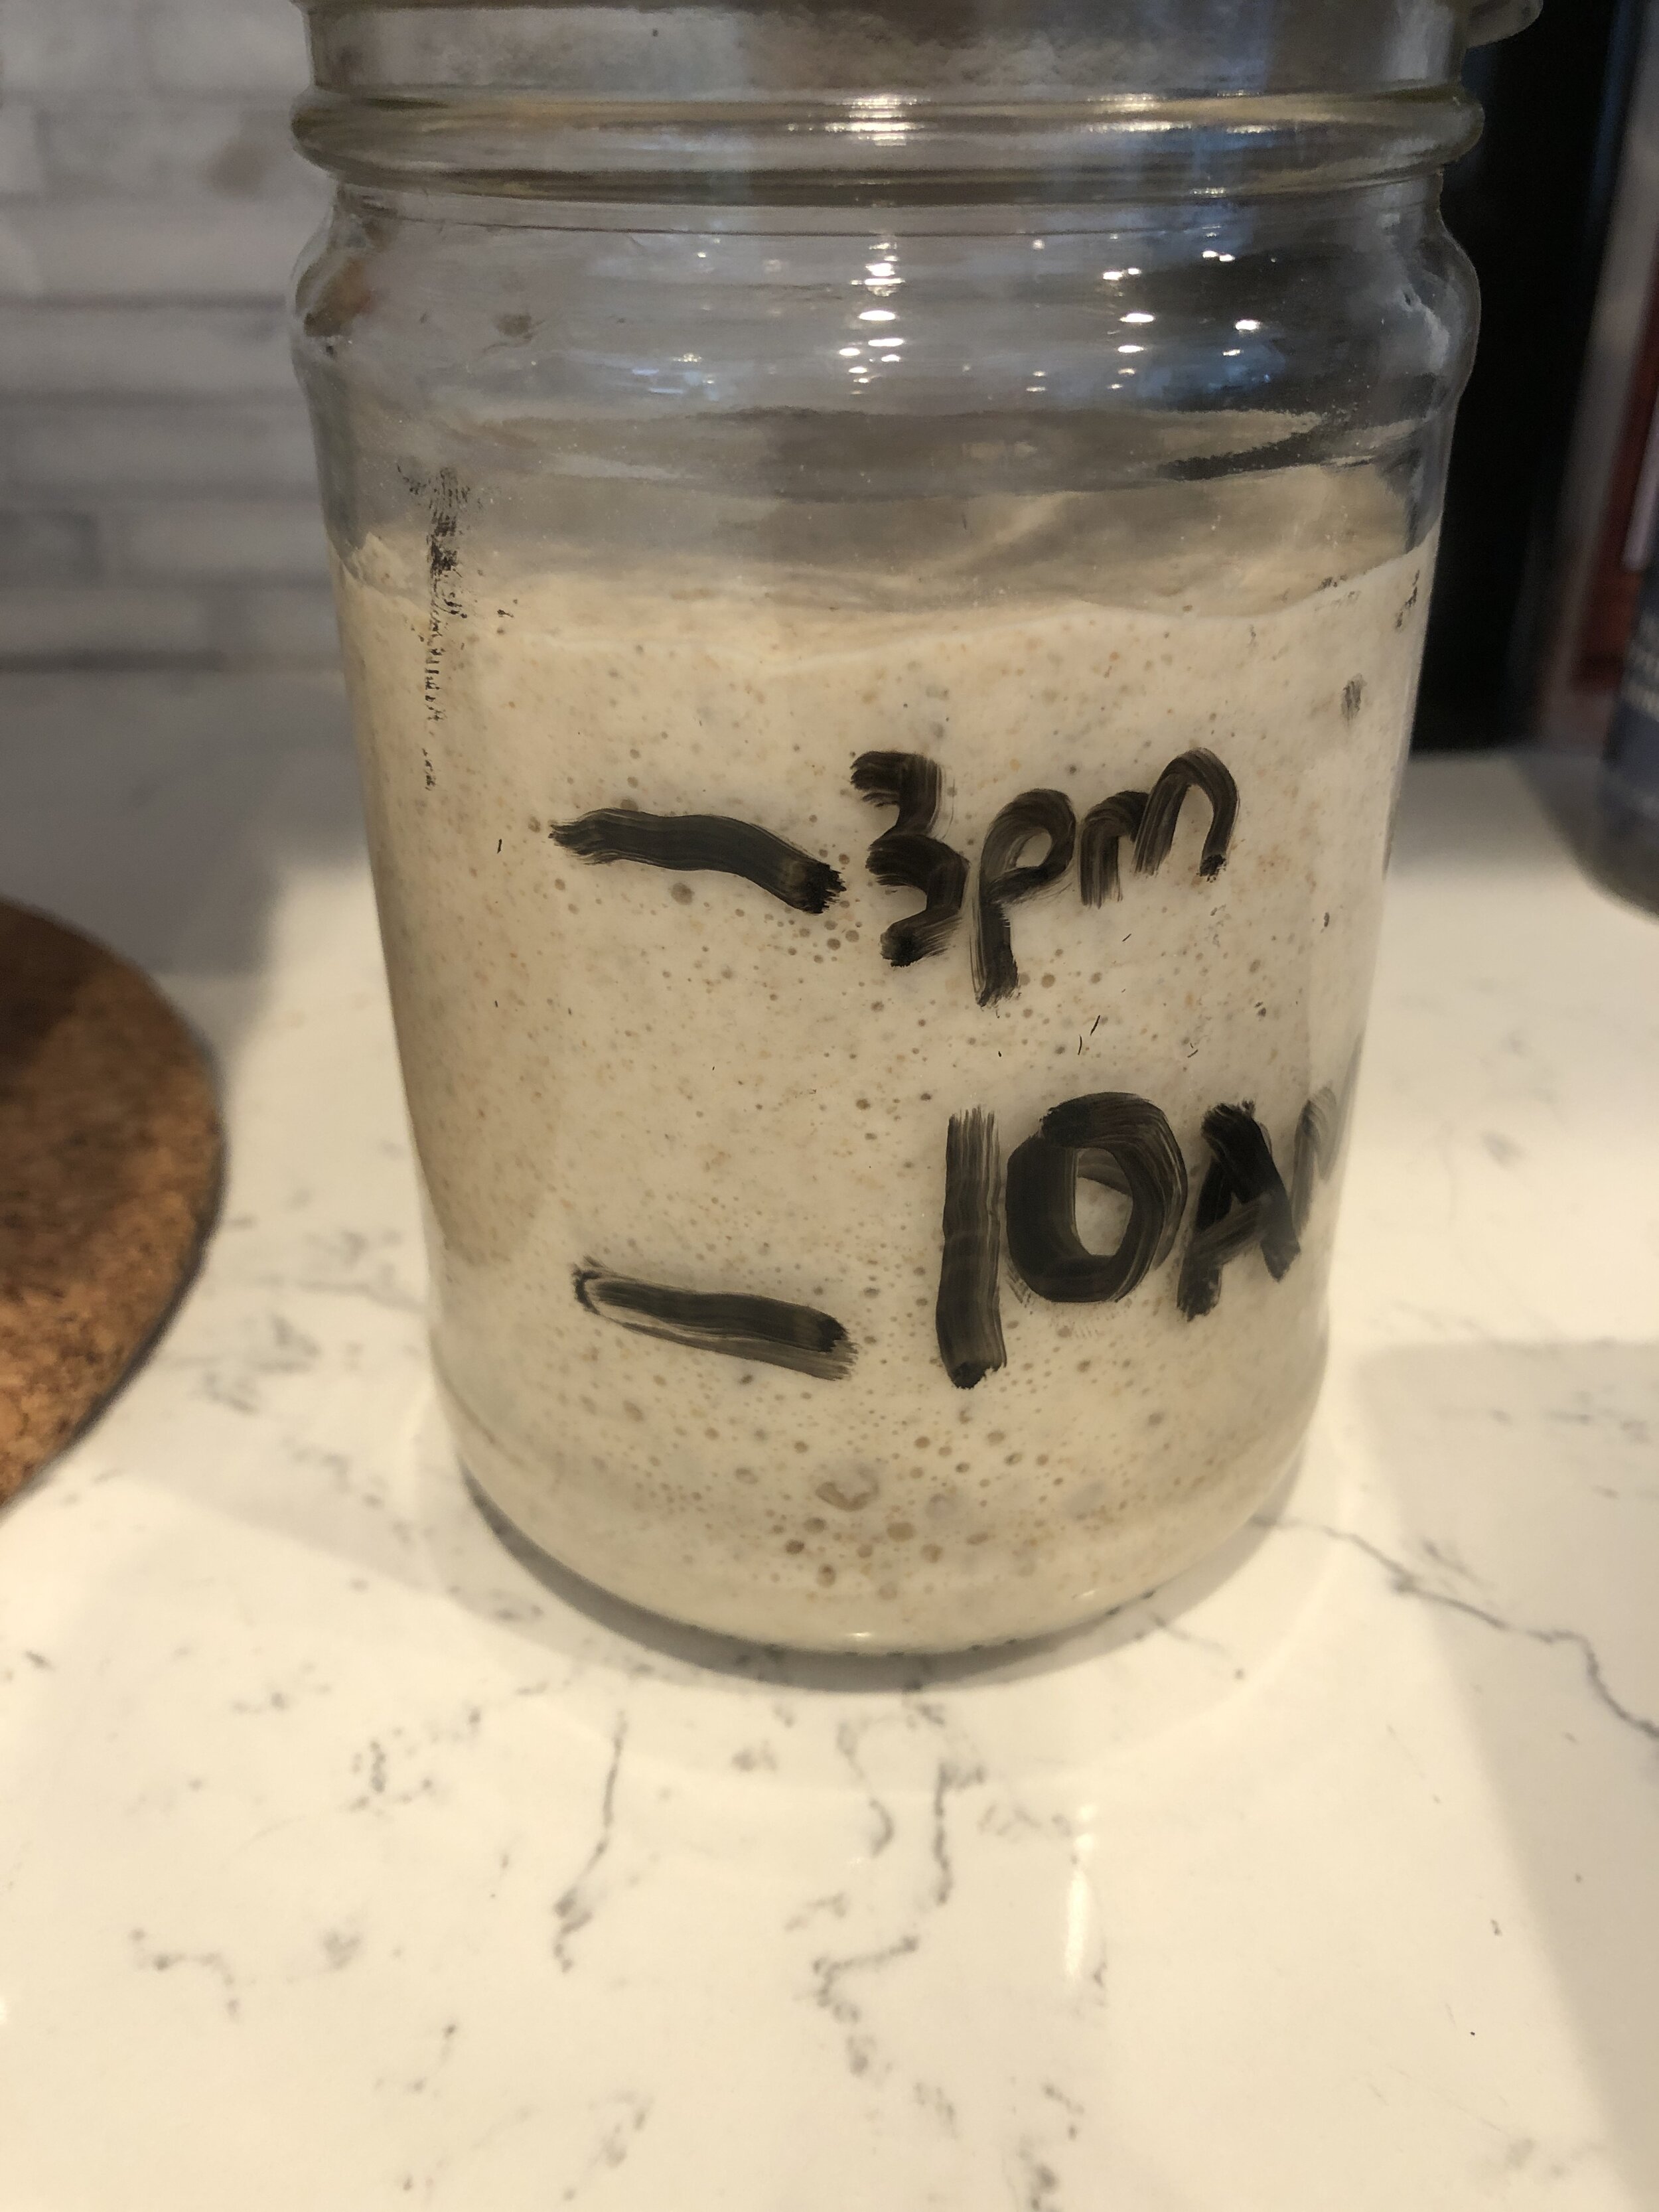
Stir until well combined and then mark where the top is and the time (see pic) I use a dry erase marker. This way you can get an idea of what it’s doing all day!
Loosely cover after feeding and set on the counter or in a cupboard.
Repeat approximately every 12 hours.
Usually by the second day you have the starter it will be growing (rising and falling) somewhat predictably- at that point you can keep maintaining a smaller starter with those measurements and can store it in the fridge to feed once a week if you are’t gonna bake with it soon, or you can start measuring 4oz (instead of 2oz) at each feeding and adjust the feeding recipe accordingly. If you decide to refrigerate it- feed it first, then wait about 2-3 hours, secure a lid on the container and keep in the fridge- feed about once a week.

How to start a starter from scratch:
Ok, this one was a PROCESS, I read SO MANY POSTS that said - “in 5 days you’ll have an active starter!!!!” nerp. Not mine. Mine took 12 days and I’ve now found a few peeps who had a similar experience and theirs took 10-15 days as well, so don’t get discouraged!!!
“Josh” our starter we started from scratch was a labor of love and we are excited to bake with him!!
It’s very similar to the recipe above but here’s how you get it poppin. I did have the luck of finding some rye flour to start “Josh” off with, but ran out between feeding both starters so he’s now on all unbleached bread flour and doin FIIIIIIINE. Pretty much anything should work as long as it’s unbleached- the “bleached” tends to stifle the growth of the natural yeast….also I’ve seen many people asking if they can use a gluten free flour and the answer appears to be that GF flour doesn’t work super well for this either….however King Arthur Flour has THIS RECIPE that you can try if you only have GF flour/want a GF starter!
I used the KING ARTHUR FLOUR HOW TO START A STARTER RECIPE and now have an active starter that we started from scratch, so my suggestion is to start with that recipe and don’t get lost down a Google-hole.

What to do with your “discard”:
This whole part of it freaked me out right from the jump- every time you prep to “feed it” you ditch a bunch of it?! WHAT!? It felt so wasteful!! However, don’t fret! I’ll share my research with you and now you’ve got it all in one nice, neat place.
First of all depending on your baking needs, you can maintain a smaller starter- thus less flour when you feed it and less discard!
My favorite resource for this topic is the ZERO WASTE CHEF who wrote a brilliant post about “How To Prevent Your Sourdough Starter From Taking Over Your Life” massively helpful. She also has tons of great recipes for your “discard”. I actually keep a mason jar in the fridge and when I am not giving starter to friends, I usually either make a sourdough starter discard scallion pancake (we grow green onions and ALWAYS have TJ’s EBTB (Everything But The Bagel Seasoning) on hand, which works very well for this recipe) or I add it to my mason jar and use it for a more robust discard recipe within about 7-10 days.
MAJORLY IMPORTANT TIP- if you are going to toss it in the bin, do just that, IN THE BIN, do not, EVER, under any circumstances dump your starter down the kitchen drain- or any drain, ever. Don’t do it.

When you want to bake with your starter:
Oh boy! Baking with your starter!! As yeast is no easy item to acquire these days, most of us are right here either writing or reading this post because we want to BAKE, dammit.
I started out with THIS recipe from K.A. Flour and it was too complicated for me, straight up. However, that first loaf will always hold a place in my heart, it’s the sliced loaf pictured below the photo grid. I mentioned the zillion steps and 43 timers I had to set during that first go in a stressed out Facebook post and my rad friend Katrina told me to try THIS ONE (loaf pictured above and photo grid below of all the steps!)
I’m officially in love, it’s my go-to sourdough recipe now because it takes me about 30 minutes before I go to bed and about 45 minutes (plus baking time) in the morning.
I generally feed my starter at 10am and 10pm so on a day I am going to start the recipe, I skip the morning feeding and instead feed the starter around 2pm. This is ok to do with a well established starter, it won’t die, I promise, the loaf above is from a starter I was “sorta feeding once a day at whatever o’clock”- just DO THE FLOAT TEST described in the recipe before you start mixing ingredients to be sure!
Skipping the 10 am feeding and feeding it at 2pm had the starter at full force by 8pm, so that’s when I start measuring and doing step 1 of the recipe. I finished the first rise by 9pm and then left it on the counter over night and got up around 7am to bake! It came out PERFECT!!!!!

What I’ve found is when a recipe calls for “ripe” or “fed” starter you want to scoop it to use it when it’s at peak height, before it starts to collapse. For me that’s about 4-6 hours after feeding it. That’s a huge reason I recommend watching it for a day or two when you first get it, so you get an idea of when it rises and falls and know about what time of day it will be at it’s peak.
A super mama in our FB Bakers group recommended this video: "15 mistakes most beginner sourdough bakers make" of and I am SO thankful ((Thank you Kymberly!!)). Definitely worth checking out his content before diving into baking your first loaf! Tons of worthy tips and pointers!

My first loaf! This one is with the KA recipe.
Good to know:
Here are general tips and knowledge for your reference:
When the starter is on your counter you feed it every 12 hours, when it’s in the fridge you feed it about once a week.
Starters like it warm, but not hot, heat kills yeast. Science! Yeast dies at 140 degrees Fahrenheit- but your starter will suffer at temperatures lower than that, I wouldn’t let it get above 90 for any reason.
What is “hooch”? Liquid on the top layer?? No stress! This is a great round up of Sourdough Starter Troubleshooting by the Clever Carrot. If you’re having any struggles, they are probably covered in that post. “Josh”, the starter I made from scratch, took longer than I initially expected, but thanks to the troubleshooting research and Jen’s amazing bakers FB group, I stayed the course and didn’t give up on him!! Now he’s hangin’ out here doubling while I type!!
Last but not least, some day, when this is all over and we are back to our extreme busyness- we may need to stash the starter for a bit- and when the time comes, I recommend this awesome post: “How to Store a Sourdough Starter” by The Perfect Loaf.
Keep me posted on your starter adventures!! I want to hear how it goes!
Stay tuned for my next post all about the history and science and math and fun curriculum you can build around your sourdough starter! My kids have had a blast with Josh and Emma and we’ve all learned a lot along the way!
